
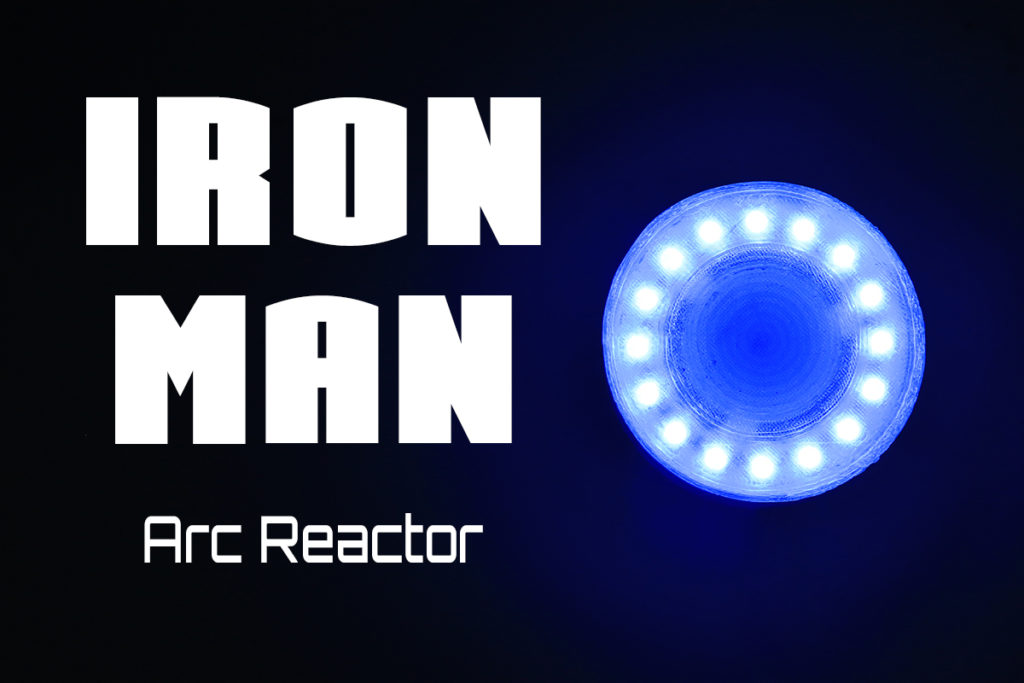
Am one of those fan who always wanted to dress up a cool superhero. In my attempt to do that I managed to build a arc reactor from very first Ironman movie using Arduino micro, Neopixel LED and touch of 3D printing. This project is quite easy to build and only takes about an hour apart from the 3D printing time might differ depends upon the quality of print you want to do. I have written this article and made a video to show how I have built this Ironman Arc reactor toy.
Materials required:
- Arduino micro or Nano
- FC-102 Neopixel LED
- Magnets
- Transparent PLA
- 5V battery pack or power bank
- Connecting wires
Tools required:
- 3D printer
- Glue gun
- Soldering iron
3D model designing of Arc reactor:
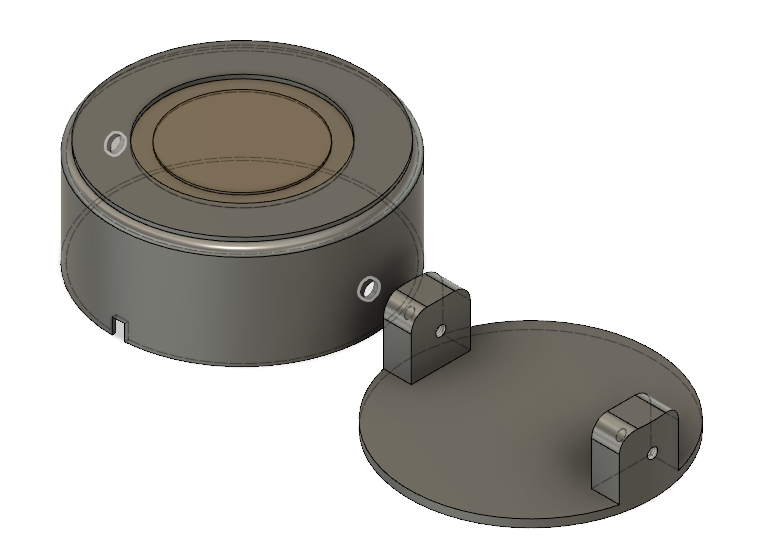
I started by designing arc reactor model that it can hold the FC-102 module and Arduino. This model basically serves as holder to the LED ring and diffuses light so that it will give neat look of arc reactor. The model is not fancy top part which holds the LED and Arduino is about 2mm thickness thick and enclosure to hold everything in place.
Both the top cover and enclosure has been given a 3mm screw hole through which both these pieces can be put together. Here is the design file for this project, remember to print this model only using transparent PLA.

Code:
Upload the below code in your Arduino Nano/ micro
#include <Adafruit_NeoPixel.h>
#ifdef __AVR__
  #include <avr/power.h>
#endif

#define PIN            6

// How many NeoPixels are attached to the Arduino?
#define NUMPIXELS      16

// When we setup the NeoPixel library, we tell it how many pixels, and which pin to use to send signals.
Adafruit_NeoPixel pixels = Adafruit_NeoPixel(NUMPIXELS, PIN, NEO_GRB + NEO_KHZ800);

int delayval = 100; // delay between each LED's

void setup() {

  pixels.begin(); // This initializes the NeoPixel library.
}

void turnoff()
{
  int i;
  for(i=0;i<NUMPIXELS;i++)
  {
    pixels.setPixelColor(i, pixels.Color(0,0,0));
  }
  pixels.show();
}

void loop() {

  int i;

  // For a set of NeoPixels the first NeoPixel is 0, second is 1, all the way up to the count of pixels minus one
  for(i=0;i<NUMPIXELS;i++){

    // pixels.Color takes RGB values, from 0,0,0 up to 255,255,255
    pixels.setPixelColor(i, pixels.Color(0,0,255)); // Moderately blue color

    pixels.show(); // This sends the updated pixel color to the hardware.

    delay(delayval); // Delay for a period of time (in milliseconds).

  }
  while(1);
}
Schematic diagram:
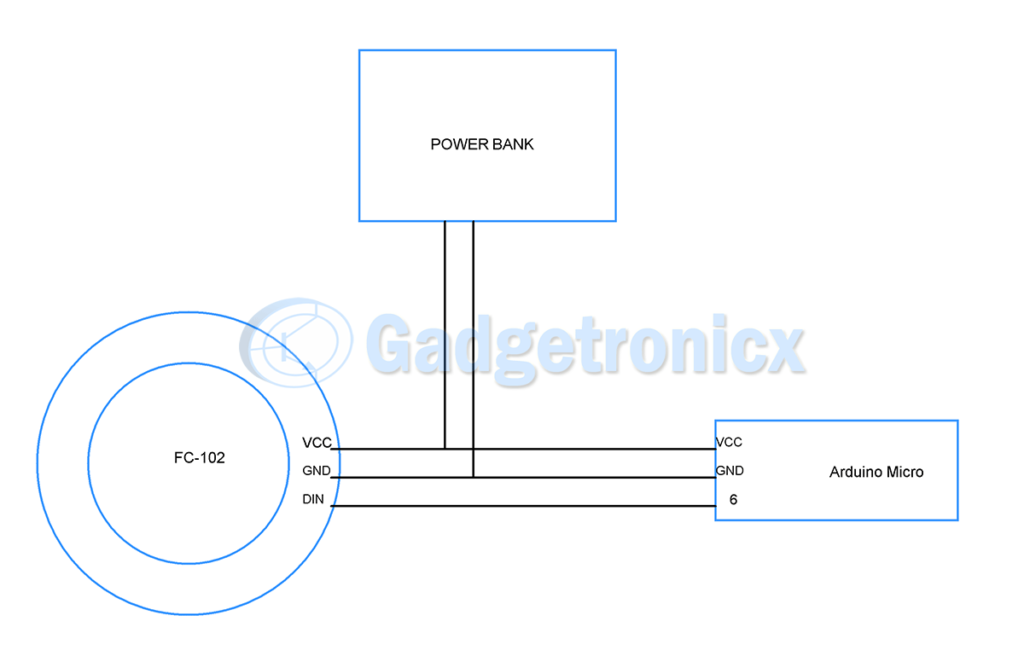
The diagram is pretty simple. The pin 6 of Arduino is used to feed the data to control the LED’s. You can use a 5v battery pack or power bank for this project. Both Arduino and LED ring operates on 5v so no other converter is required.
Assembling and Fixing:
Once the printed model is ready, assemble the Circuit into the top of the model. I have made a video of assembling this arc reactor together, hope it will be of guide you to assemble this project completely.
Hope this article and video helped you to build your own Arc reactor. Leave a comment below if you have any queries or feedback about this project and am working on Version 2 of Arc reactor from other Iron man movies and shall publish it soon. Happy DIY 🙂


