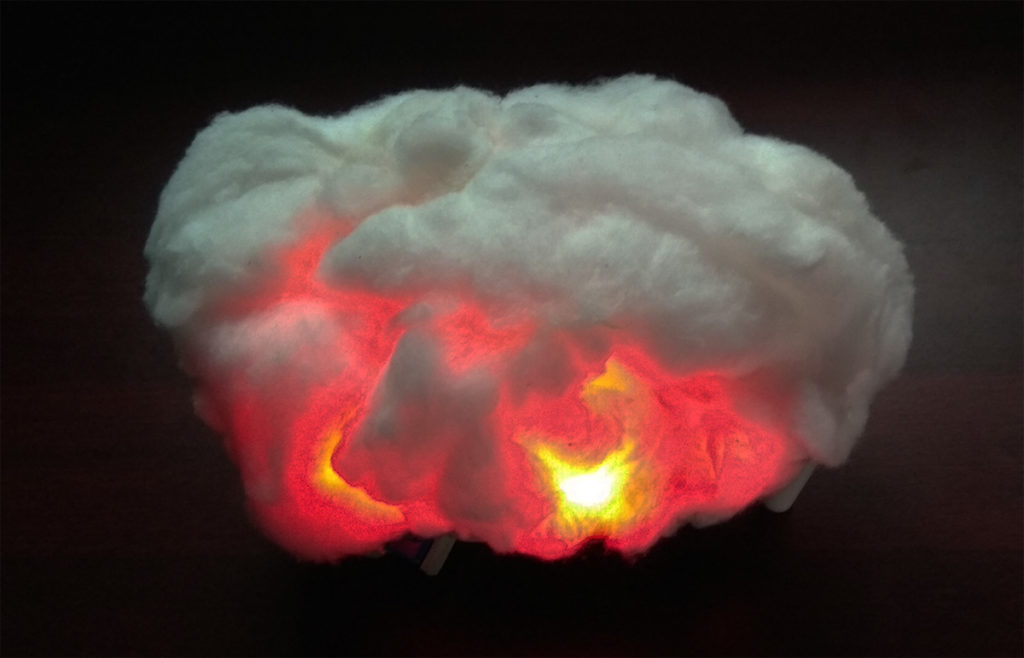
Lights were really an essential part of Christmas celebrations. Apart from decorating the Christmas tree or my house I thought to build something apart from this. So I have made a classic cloud lights with red LED’s to give a Christmas touch to the project.
MATERIALS REQUIRED FOR CLOUD LIGHTS:
Arduino Uno
Red LED’s
Connecting wires
Cotton
Glue
9V battery
SCHEMATIC DIAGRAM:
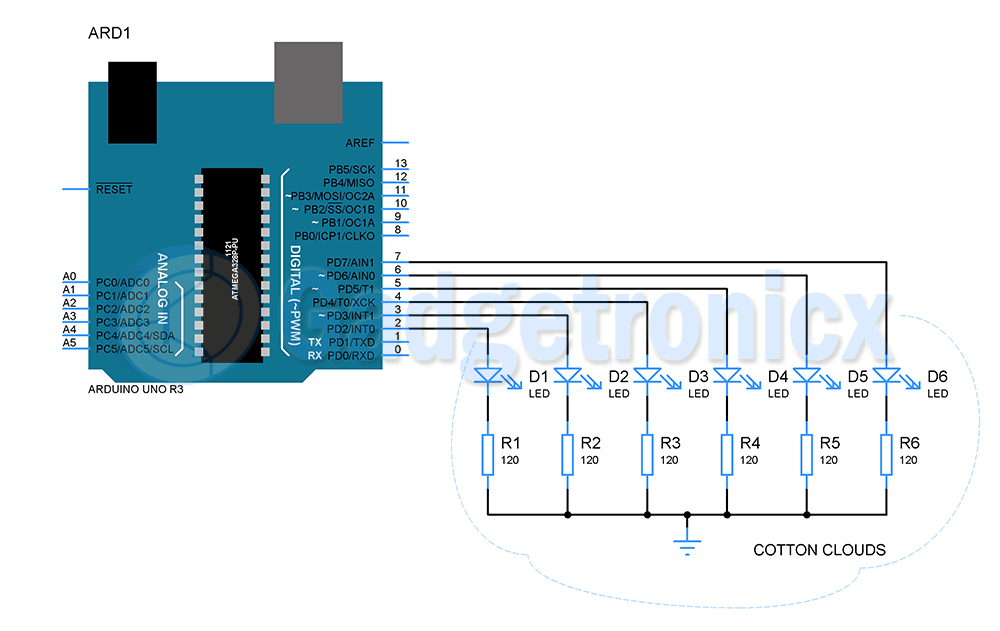
The schematic diagram of this cloud lights is pretty simple and self explanatory. The circuit needs to be powered by any appropriate power supply of your choice. But I have used a 9v alkaline battery to make the circuit really portable. 6 Red LED’s were connected to 6 digital pins of Arduino. Resistors R1 to R6 to control the current flow through LED’s. You can increase the number of LED’s by utilizing other digital pins in Arduino or you can use a transistor as an activator and add more LED’s to the project.
BUILD INSTRUCTIONS:
Assemble the LED’s on a cardboard which will form a base plate.
Insulate the conductor ends of LED’s using a heat shrink tube.
Place the Arduino and battery on the other side of this base plate.
Use screws to keep the Arduino in place whereas use double sided tape to make the battery to stay in place. Also add a switch in the circuit, making it easy to operate.
Now take cotton of ample quantity and cover it on the top of LED’s in the shape of a cloud, use some common adhesives like glue to stick the cotton to the cardboard.
Now you should have the LED cloud ready to operate.
Also adding the Arduino at the bottom will allow you to program it at your convenience in case if you need to change the animation of the lighting.
ANIMATION SEQUENCE:
Well this project is pretty simple but I wanted to make the animation lighting sequence bit similar to the lighting. So I had to play around with the delay timings and lighting up sequence of the LED’s.
Lightning sequence: To make the effect looks like a lightning passing I have to light up the LED’s in continuous sequence with very little delay.
Light burst: To create a light burst look alike effect single LED’s are activated for about two to three times with delay between them.
You may need to experiment with the code to find the lighting effect that interests you. Also adding more LED’s will make it look more cooler, try it.
NOTE:
You can also use other Arduino variants for this project.
Use transistors if you intend to add more than one LED’s in a single Arduino pin.
Always keep the power requirement of the LED’s in mind just in case if you want to go with more number of LED’s.
This is simple fun project to try out for this Christmas. Do try it out and share your thoughts and feedback with us. Check out our other “Lighting projects here” Happy DIY 🙂 and Merry Christmas 🙂