Weather meter using PIC 16F877 Microcontroller

weather-meter-system

Weather monitoring systems are available in plenty and these are pretty handy gadgets we use in our daily life for weather forecasting and other purposes. But these kinda gadgets might be expensive and may not be available for customization to our specified purpose. To overcome these advantages you can build this customized weather meter using PIC microcontroller which won’t cost much like those gadgets.

DESIGN OF WEATHER METER:

schematic-design-weather-meter-using-pic-microcontroller

The system is built around PIC microcontroller where three parameters is seen for. Humidity,Temperature and ,Light intensity are the parameters this system takes as input to understand the weather condition. Then these parameters will be shown in LCD screen for the user.

TEMPERATURE SENSOR:

lm35-pin-diagram

LM35 was used as a temperature sensor which is capable of sensing temperature ranging from -55 C to 150 C. The output voltage will be proportional to the temperature hence there is no need of trimmers. The output voltage of this sensor varies by 10mv per degree change in temperature.
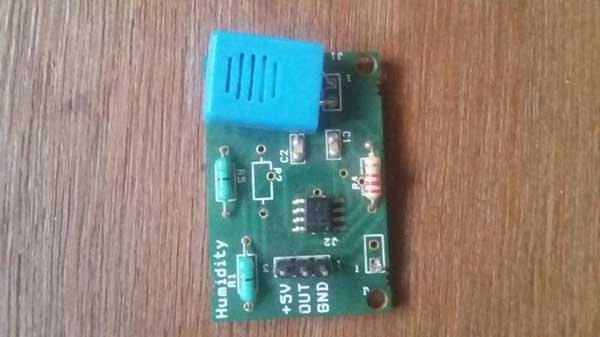
HUMIDITY SENSOR:

humidity-sensor-module

Bought this Humidity sensor from a local store. The obtained output voltage is scaled to percentage and the reading in means of percentage is displayed in the LCD.
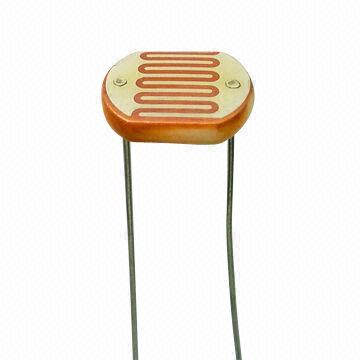
LIGHT SENSOR:

ldr-component

Simple LDR is used to measure the light intensity of the environment. Here LDR was used along with a resistor to form a voltage divider and the output is obtained from that divider. This output is also scaled to percentage and displayed in the LCD for the user.

ALGORITHM:

  1. Initialize the LCD display.
  2. Display “H” , “L” and “T” which represents the parameters Humidity, Light intensity and Temperature.
  3. Define various weather conditions such as Sunny, rainy ,etc  for the expected sensor readings.
  4. Initialize the ADC Channels for the respective sensors.
  5. Read the sensor output one by one.
  6. Make appropriate conversion of the ADC value.
  7. Display the sensor values in the LCD display for the user.


CODE:

#include <16F887.h>
#device ADC=10
#FUSES NOWDT                    //No Watch Dog Timer
#FUSES NOBROWNOUT               //No brownout reset
#FUSES NOLVP                    //No low voltage prgming, B3(PIC16) or B5(PIC18) used for I/O
#use delay(crystal=8MHz)
#include
#byte LCD=0x08 
#bit ENABLE=0x09.1
#bit REG_SL=0x09.0
#bit TRIS_ENABLE=0x89.1
#bit TRIS_REG=0x89.0
#byte TRIS_LCD=0x88 
char msg1[7][9]={"WEATHER:","SUNNY","RAINY","HOT","CLOUDY","COLD"};
char tem[3]="H:";
int8 temp,humd,light;

void lcd_cmd(char cmd)               //Subroutine to send command    
{     
  LCD =cmd;    
  REG_SL=0;
  ENABLE=1;
  delay_ms(2);
  ENABLE=0;
  delay_ms(2);
}  

void lcd_data (*dat)          //Subroutine to send data
{ 
while(*dat!='\0')
 {      
  LCD =*dat;      
  REG_SL=1;
  ENABLE=1;
  delay_ms(2);
  ENABLE=0;
  delay_ms(2);      
  dat++;
 }
delay_ms(2);
}

void lcd_init ()    
{     
  lcd_cmd(0x38);       // 8-bit mode - 2 line - 5x7 font.      
  lcd_cmd(0x0C);       // Display cursor without blink.     
  lcd_cmd(0x06);       // Automatic Increment - No Display shift.        
  lcd_cmd(0x01);          
  lcd_cmd(0x80);       // First row first column     
}   

char condition()       //Defining conditions (Alter condition parameters as per requirement)
{
  if(temp>=25&&humd<70&&light>90&&temp<=30)
  return(msg1[1]);                       //Sunny
  else if(temp>30&&humd<60&&light>90)
  return(msg1[3]);           //hot
  else if(temp<=25&&humd>90&&light<70)
  return(msg1[2]);           //Rainy
  else if(temp<=25&&humd>60&&light<50)
  return(msg1[4]);           //cloudy
  else if(temp<=20&&humd>80&&light>70)
  return(msg1[5]);           //cold
  else 
  return 0;
}

void main()     
{       
 char conv_val[10];
 int32 adc_value;
 TRIS_LCD=0x00;
 TRIS_ENABLE=0;
 TRIS_REG=0;         
 lcd_init(); 
 lcd_cmd(0x80);
 lcd_data(tem);
 SETUP_ADC_PORTS(sAN0|sAN1|sAN2);  //Setting ADC PORTS
 SETUP_ADC(VSS_VDD|ADC_CLOCK_INTERNAL);
 delay_ms(5);
 tem="L:";
 lcd_cmd(0x87);
 lcd_data(tem);
 tem="T:";
 lcd_cmd(0x8c);
 lcd_data(tem);
 while(TRUE)
  {
   SET_ADC_CHANNEL(0);
   lcd_cmd(0x82);
   adc_value=READ_ADC();
   delay_ms(2);
   adc_value=(adc_value*100)/1023;  //Percentage conversion
   humd=adc_value;
   sprintf(conv_val,"%d",humd);
   lcd_data(conv_val);
   SET_ADC_CHANNEL(2);
   lcd_cmd(0x89);
   adc_value=READ_ADC();
   adc_value=(adc_value*100)/1023;  //Percentage conversion
   light=100-adc_value;
   delay_ms(2);
   sprintf(conv_val,"%d",light);
   lcd_data(conv_val);
   SET_ADC_CHANNEL(1);
   lcd_cmd(0x8e);
   adc_value=READ_ADC()/2;
   delay_ms(2);
   temp=adc_value;
   sprintf(conv_val,"%d",temp);    //Actual temperature conversion
   lcd_data(conv_val);
   lcd_cmd(0xc0);
   lcd_data(msg1[0]);
   delay_ms(500);
   lcd_cmd(0xc8);
   lcd_data(condition());
 }
}


Weather Meter
Weather Meter
Weather meter.rar
26.7 KB
19 Downloads
Details

5 Comments

  1. Phil Busby

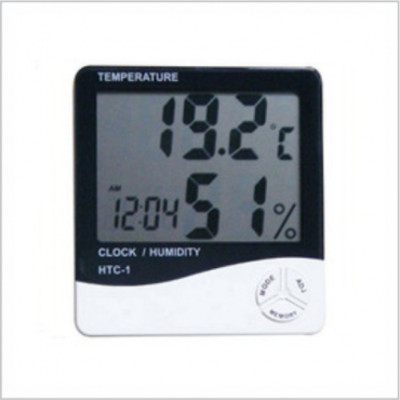
    The LM016L LCD screen is a 2 row x 16 col alphanumeric display. The picture that you have shown is a specially made display for the large size temperature and humidity digits, plus a small clock. Do you not think that the image you have used is a bit misleading?

    Reply
  2. anonymous

    what type of humidity sensor did you use.

    Reply
  3. anit

    send to me file .HEX
    souksavathvirasak@gmail.com

    Reply
  4. Anonymous

    Excellent project. What compiler did you use for this project?

    Reply
    1. Frank DonaldFrank Donald (Post author)

      CCS compiler.

      Reply

Leave a Comment

Your email address will not be published. Required fields are marked *