
If you are looking for some super cool DIY projects using Raspberry Pi, you are in the right place. Am pretty sure that this cool Raspberry Pi Photo booth will make a great addition to your party. Before I proceed I want to convey my thanks to Chris Evans for permitting me to write on his behalf and share his work in our website. Here you can read the original project article from his site Drumminhands.
PROJECT DESCRIPTION:
DIFFICULTY LEVEL: Intermediate
This Photo booth is not just meant for taking photos, its equipped with better features that makes them unique. This project uses a Camera module operated by Raspberry Pi to capture photos and then turn them into beautiful GIF images. And the coolest feature is it will automatically upload the converted GIF images into your Tumblr account with ease, sounds cool isn’t it.
PARTS:
This list includes all the basic parts apart from the enclosure.
- Raspberry Pi – $36
- Raspberry Pi Camera module – $20
- 5V power adapter including USB A to Micro B cable – $9
- SD card with 8GB or more memory – $13
- 7 inch monitor (HD or SD is your preference) – $64
- HDMI or RCA video cable (depends on monitor you use) to connect from Pi to your screen
- Power adapter for your monitor
- USB / Wireless keyboard and mouse
- Arcade button with in build 5V LED
- GPIO cables
- Tripod Mount
Please note if you are using Raspberry Pi 3, the composite video is hidden in the TRRS audio adapter.
OPTIONAL PARTS:
The listed parts can be used to give your Photo booth a professional finish. However using it totally up to you.
- WiFi adapter in case you need to establish wireless internet connection – $9
- TTL cable to troubleshoot or make changes without disturbing the setup.
- Pi Cobbler
- USB power panel mount
- Ethernet panel mount
- USB port panel mount
ALGORITHM OF PHOTO BOOTH:
- Start the device
- Turn on all the LED’s on the front to indicate the device is getting started and turn if off after few moments
- Await Arcade button press from the guests.
- Once the button is pressed blink the “Get ready” light asking the guests to get ready
- Display the real time video preview on the monitor
- Blink the “Pose” LED for few seconds to ask the guest to pose for the photo.
- Capture a photo and save it in .jpg format with filename marked with time stamp.
- Repeat four times
- Process all the captured images
- Turn off the video preview in the monitor
- Now blink the uploading light to indicate that the photo is getting uploaded to Tumblr
- Combine all the four images into a animated GIF
- Upload the converted GIF image to Tumblr
- Stop blinking the “Uploading” light and lit up the “Done” light for few seconds.
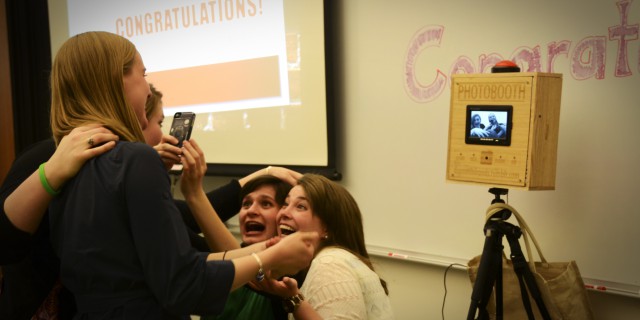
- Play the GIF images in the screen few times to guests to see the outcome of their photo session.
- Now await another Arcade button press.
- Shut down the Raspberry Pi once done.
DESIGN:
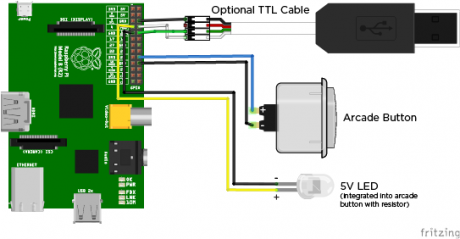
Here is the design of Photo booth which shows the connection of optional TTL: cable and Arcade button integrated with LED. Connect other LED’s similarly to the GPIO’s of the Pi (Omitted in the design).
SETTING UP THE PHOTO BOOTH:
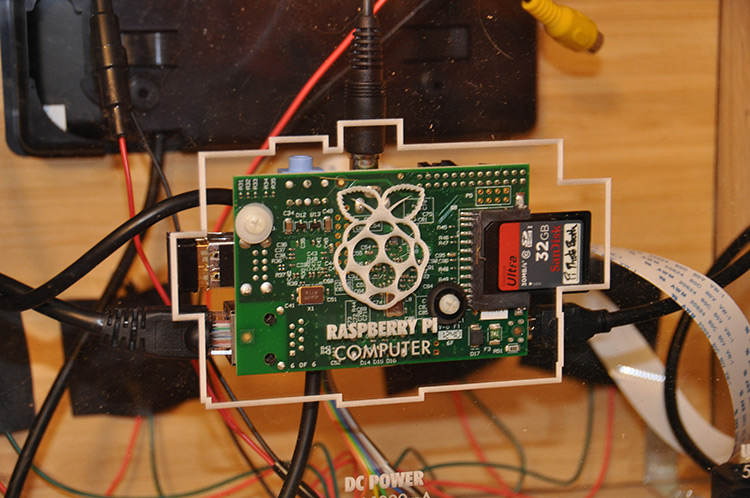
I decided to assemble all the necessary parts inside a wooden box. This will give a cool real Photo booth look to my project. Affixing the Pi in a glass panel, I have affixed and connected other parts together and assembled them in side the wooden box.
Mount the entire setup over a tripod and make sure it is stable. You can also use PA speaker mount for this which offers good level of stability. Also place it where the guests can pose for the photos with ease. Prepare a good lighting atmosphere for the guests.
SETTING UP THE RASPBERRY PI:
- If you are just getting started with your Pi, first of all you need to install Noobs on the SD card
- Now you need to configure your Pi to display video preview in the monitor
- For that you need to edit a config file
sudo nano /boot/config.txt
Comment out the below line
# hdmi_force_hotplug=1
Also you may need to change other settings in this config file to get decent looking video on your screen. Here are the tweaks i have done in my config file.
start_x=1
gpu_mem=128
framebuffer_width=800
framebuffer_height=480
sdtv_aspect=3
disable_camera_led=1
Here is a nice tutorial on booting your Pi directly into a GUI desktop . Disable the screen saver by editing the GUI session autostart
sudo nano ~/.config/lxsession/LXDE-pi/autostart
And add the following in the autostart file :
@xset s 0 0
@xset s noblank
@xset s noexpose
@xset dpms 0 0 0
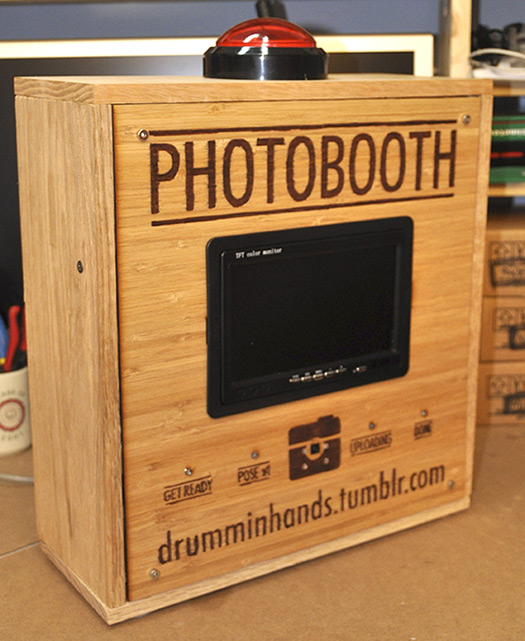
TAKING PHOTOS:
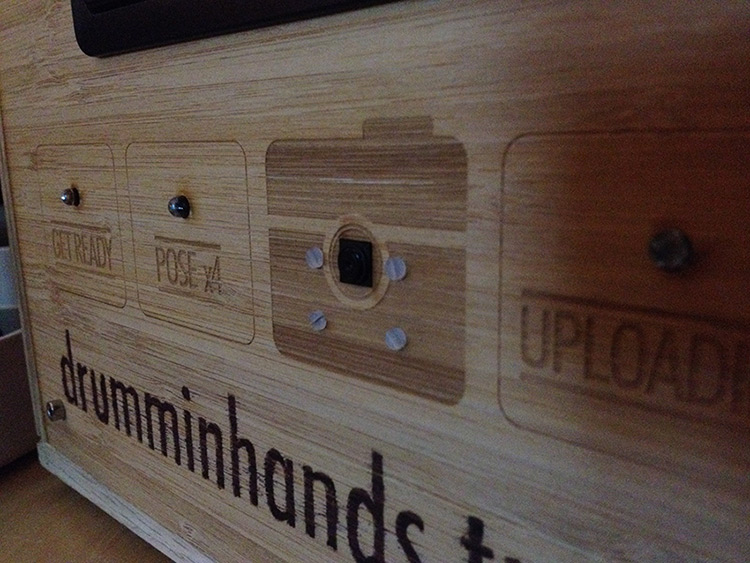
Front view of Photo booth
Plug the camera to the Raspberry Pi when it is turn off. Now boot it up and follow these instructions to for setting up initially. For the purpose of controlling camera using i have used PiCamera. You can install PiCamera from here.
CREATING ANIMATED GIF IMAGES:
This project uses GraphicsMagick to convert the images captured to animated Gif. Follow these installation instructions to get it installed in your Raspberry Pi. But the following should work fine as well
sudo apt-get install graphicsmagick
After successful installation get some images into your directory and test the functioning of GraphicsMagick using the following code.
gm convert -delay 100 *.jpg joined.gif
UPLOADING TO TUMBLR:
Pytumblr and the Tumblr API are the two apps you need to upload the captured photos from Pi to internet. To get Pytumblr follow these steps
- First install PIP somewhere on your Pi.
- Open the terminal and navigate to PIP folder you downloaded and moved to Pi, now run the below code:
sudo python get-pip.py
- Download Pytumblr and copy the files to your Pi. Now unzip the obtained file into your Pi
wget "https://github.com/tumblr/pytumblr/archive/master.zip"
- Navigate to Pytumblr master folder and run the below command to install it
sudo python setup.py install
FINAL CODE:
You can get the final code in GitHub. Few variables needed to be altered with your device information and so. Make the changes and save anywhere you want. I have placed the code in the folder named as
/home/pi/photobooth/
Now we need to get the code running on your Raspberry Pi once at the start up. Here is a nice tutorial that could guide you to do it.
sudo nano /etc/xdg/autostart/myscript.desktop
And now save something like the following:
[Desktop Entry]
Type=Application
Comment=Start my script
NoDisplay=false
Exec=sudo python /home/pi/photobooth/drumminhands_photobooth.py
NotShowIn=GNOME;KDE;XFCE;
Name[en_US]= drumminhands_photobooth.py
We have reached the end of tutorial on building DIY Photo booth. Hope this article helped to build your Photo booth as well, do try this and post your outcomes. Now, Say cheese 🙂


