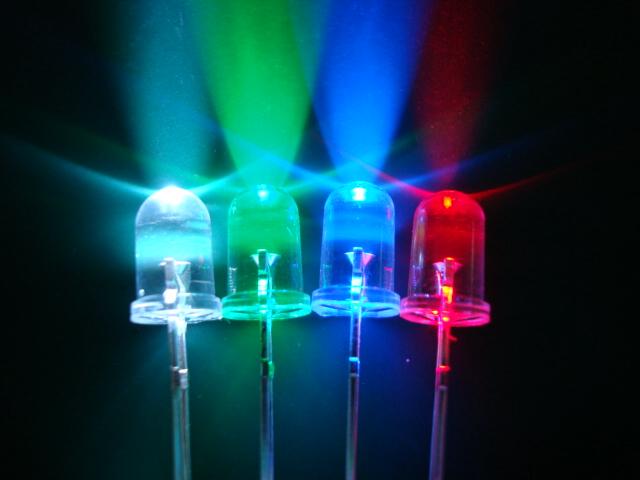
LED’s have become most important component in lighting industry due to its miniature size and less power consumption. Also LED lights are lot more attractive than the primitive lights used once. This project focused on building an remote controlled LED with multiple lighting effects. Imagine setting the mood of your room using remote, will be cool isn’t it.
DESIGN OF RECEIVER AND CONTROLLER:
The receiver and Controller part comes with TSOP1738, a receiver capable of receiving IR beam of 38Khz which is the operating frequency of a normal household remote. This receiver acts as an activator for the controller connected to it. PIC12F1822, a 8 pin low end microcontroller is deployed as a controller in this project. Other low end microcontrollers can also be used for this purpose.
DESIGN OF LED DRIVER:
The Microcontroller cannot produce enough current to drive a large set of transistors. So we are using a Transistors as a driver element in this circuit, RA2 pin from the controller feeds the signal to the base of these transistors. The reason for using two individual transistors is to create attractive effect when driven by a pulse from the Microcontroller. When the Pulse from MCU is Logic 1 Q1 will activate the LED’s connected to it, when it was logic 0 Q2 will activate all the LED’s connected to it.
TSOP 1738:
TSOP1738 is a simple IR receiver capable of receiving IR pulses of frequency 38Khz. The output of this component is active low which means that this component gives low output when IR beam is incident on it and high output in the absence of IR beam. Refer the “Datasheet” for more information about this component.
METHODS TO IMPLEMENT MULTIPLE EFFECTS IN LED LIGHTS:
We are going to add effects using two methods in this project. You can choose the method you find it comfortable to use.
This is a pretty old trick in sleeves of every designer when comes to controlling. The PIC12F1822 has an inbuilt PWM module using which we are going to control the illumination of led.
In the above code i varied the value of integer “i” based on the incident pulse on TSOP 1738. Thus with each press on the remote the duty cycle of PWM will alter thus making LED to glow in multiple effects.
2) USING VARIABLE DELAY:
In this method we are going add effects by altering the time delay manually between Logic 1 and Logic 0. This method will be useful when you want to do this project with even low end controllers with no inbuilt PWM.
In the above code i varied the “delay_ms()” value between On and Off time based on the incident pulse on TSOP 1738. Thus with each press on the remote the duty cycle of PWM will alter thus making LED to glow in multiple effects. Note that using variable delay may need the IR beam to be continuously incident on TSOP for some time since microcontroller will be busy executing the delay at the instant you press the button.

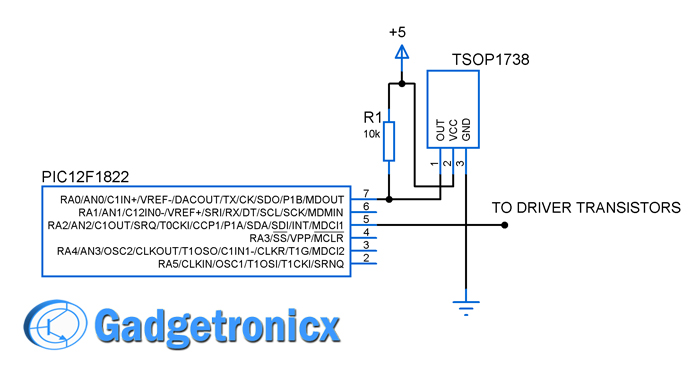 The receiver and Controller part comes with TSOP1738, a receiver capable of receiving IR beam of 38Khz which is the operating frequency of a normal household remote. This receiver acts as an activator for the controller connected to it. PIC12F1822, a 8 pin low end microcontroller is deployed as a controller in this project. Other low end microcontrollers can also be used for this purpose.
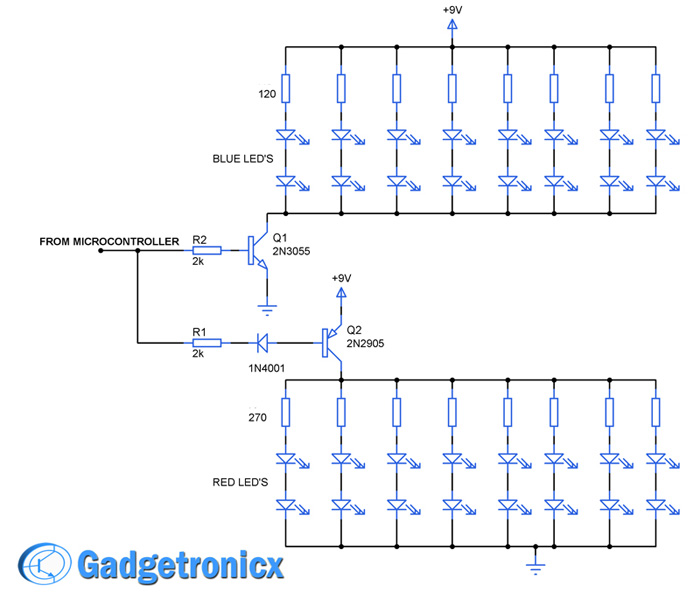 The Microcontroller cannot produce enough current to drive a large set of transistors. So we are using a Transistors as a driver element in this circuit, RA2 pin from the controller feeds the signal to the base of these transistors. The reason for using two individual transistors is to create attractive effect when driven by a pulse from the Microcontroller. When the Pulse from MCU is Logic 1 Q1 will activate the LED’s connected to it, when it was logic 0 Q2 will activate all the LED’s connected to it.
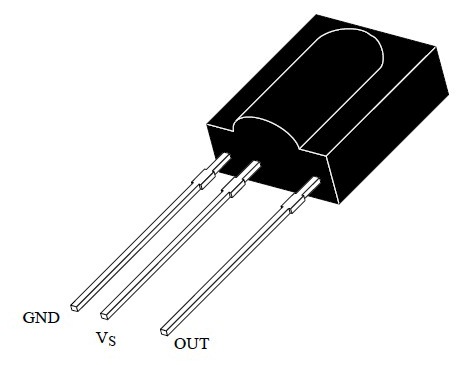


 RF Remote control circuit")


NICE BLOG DEAR………..!!!!!
Thank you