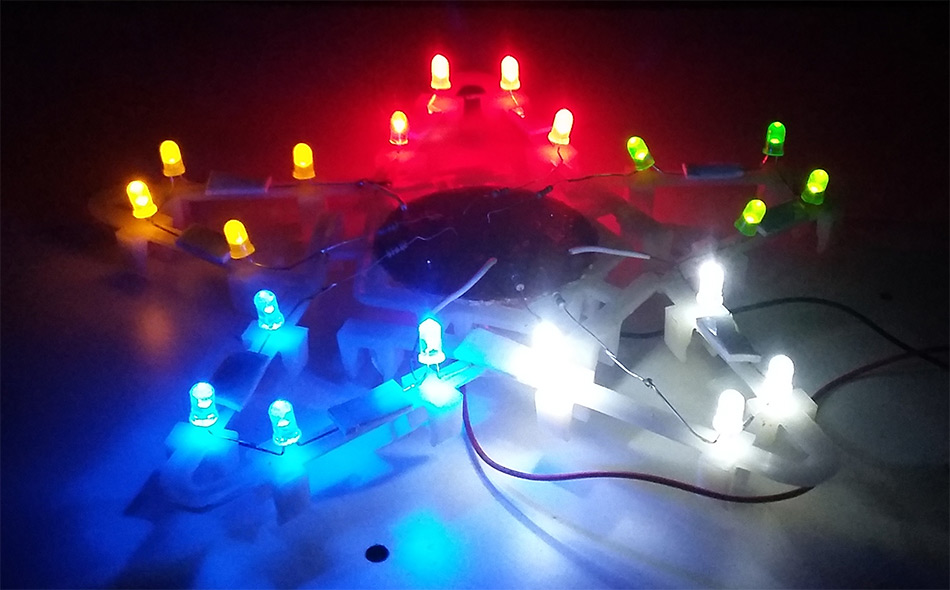
LED’s, the thing that fascinates me and inspire to build things out of it. Its cool look and miniature size made these superstars a great thing to play and build with. Here is the thing i have made, a DIY Penta colored star which will add great looks to your living room. This took me about 2 and a half hours to complete, soldering and sticking the components to the platform was a big pain. But in the end star LED light turns out very well 🙂
PARTS REQUIRED:
Blue, Red, Yellow, White and Green LED’s – 4 each
100 ohm Resistor – 6
9v Battery – 1
Connecting wires
Please support us by buying parts from the below links through Amazon.
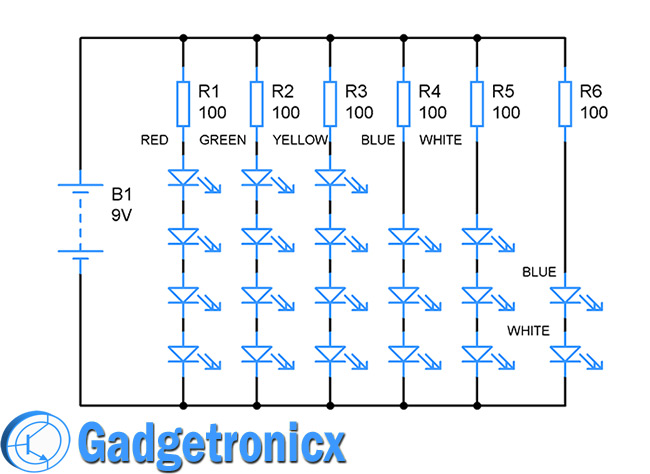
CIRCUIT DIAGRAM OF PENTA COLORED STAR:
The circuit diagram is pretty straight forward. We have chosen five color LED’s for five different wings of the star. Each set carries 4 LED’s and this forms lighting element in each wing. However I have chosen 9v battery to power this whole thing up for its easier mobility. Red, Yellow and Green LED’s consume around 2.2v so it is possible to power 4 LED’s in series through a 9v battery. However the Blue and white LED’s consume around 2.8v approx which makes it impossible to use 4 LED’s in series. Therefore i have used three LED’s in each set of White and Blue wing. Then i hooked up rest of the two (1 Blue and 1 White) together making a total of 6 LED sets.
R1 to R6 serves as current limiting resistor in the circuit. You can change the power supply to 12v if you feel it will comfortable. This will allow you to power 4 Blue and white LED’s in series together. That’s it with the schematic of Penta colored Star LED light.
SETTING UP LED’s:
First you need to find a perfect base platform for your LED’s to sit on.
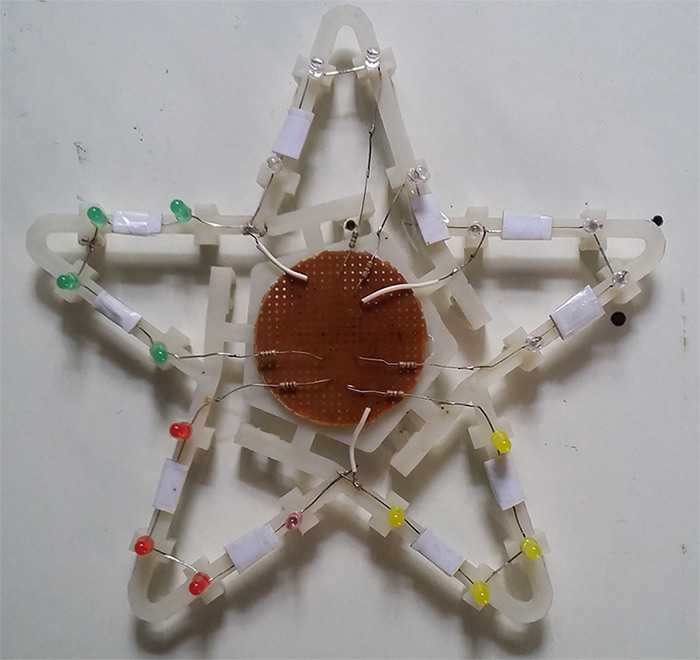
I have used a Star shaped platform which i found in a faulty Christmas decoration star.
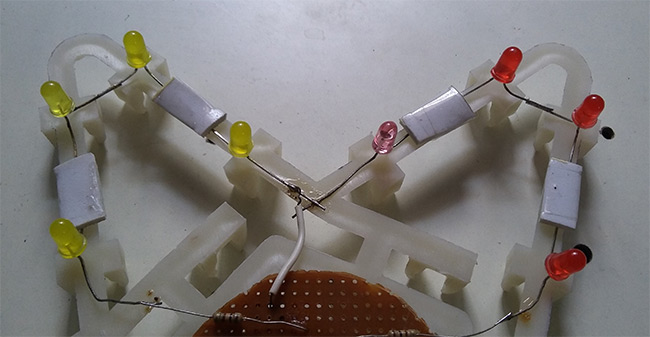
I used the platform as a base and started working on one wing at a time with each colored LED sets.
Solder each LED’s together as per the connection shown in the circuit. Once all the LED’s are soldered set it up on the star base and use tapes or adhesives to keep it firm in place.
Once all the wings are set up, now i need a center piece to connect all the LED’s together to power it up easily using my 9v battery.
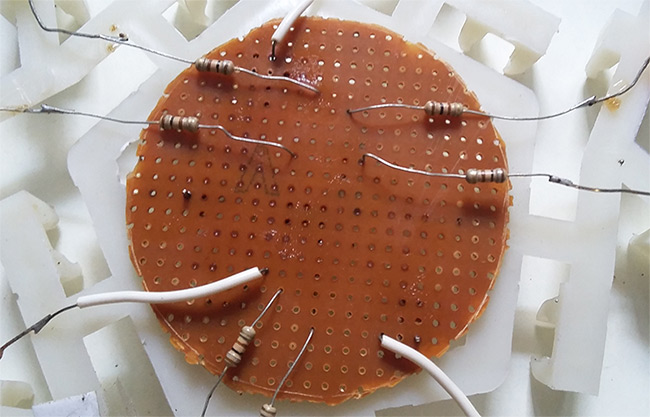
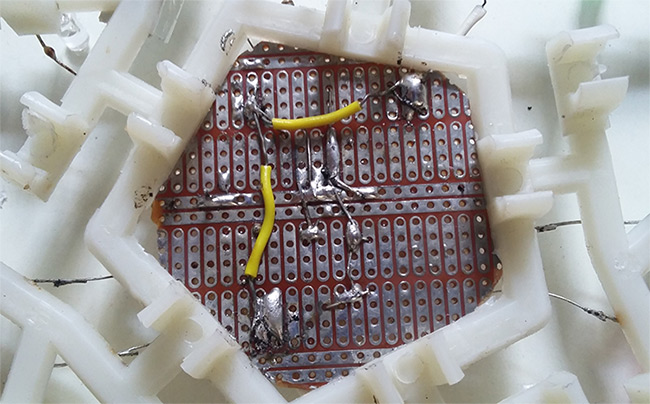
For this center piece i have cut a general purpose Vero board in a circle shape. I have stuck it to the center of the star base using a strong adhesive.
Once done i started connecting the wings and soldering them together with corresponding resistors and wires in place.
Above you see the back view of my center piece where i have connected and soldered everything together to power it from the battery.
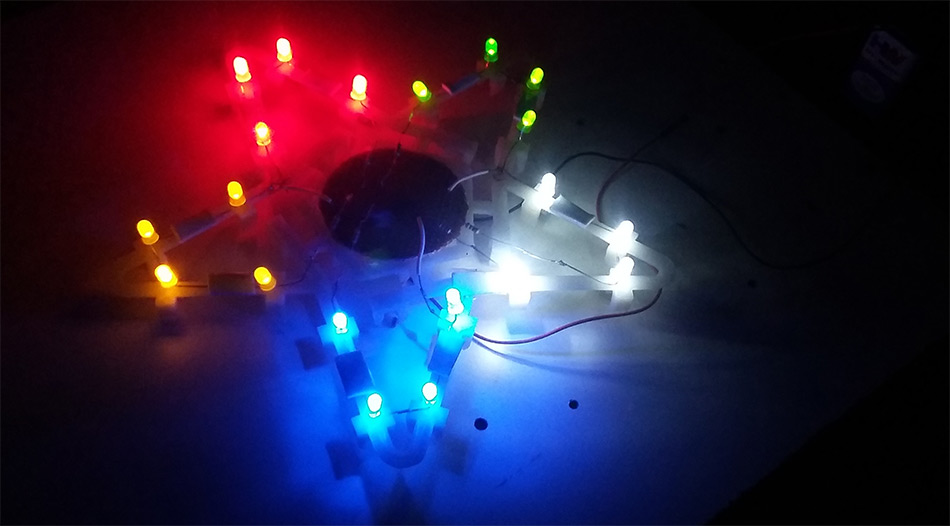
FINAL PRODUCT:
And here is the final product of my work. You can see each wings of LED’s connected together using the center piece. And Blue and White LED sets are connected in three and two combination is also visible.
Hope you all like this article and try to build one by yourself. Try this with different colored LED’s and new combinations. You can try this on any unique shapes, it might add extra flavor to it. Thanks for reading, Happy DIY 🙂